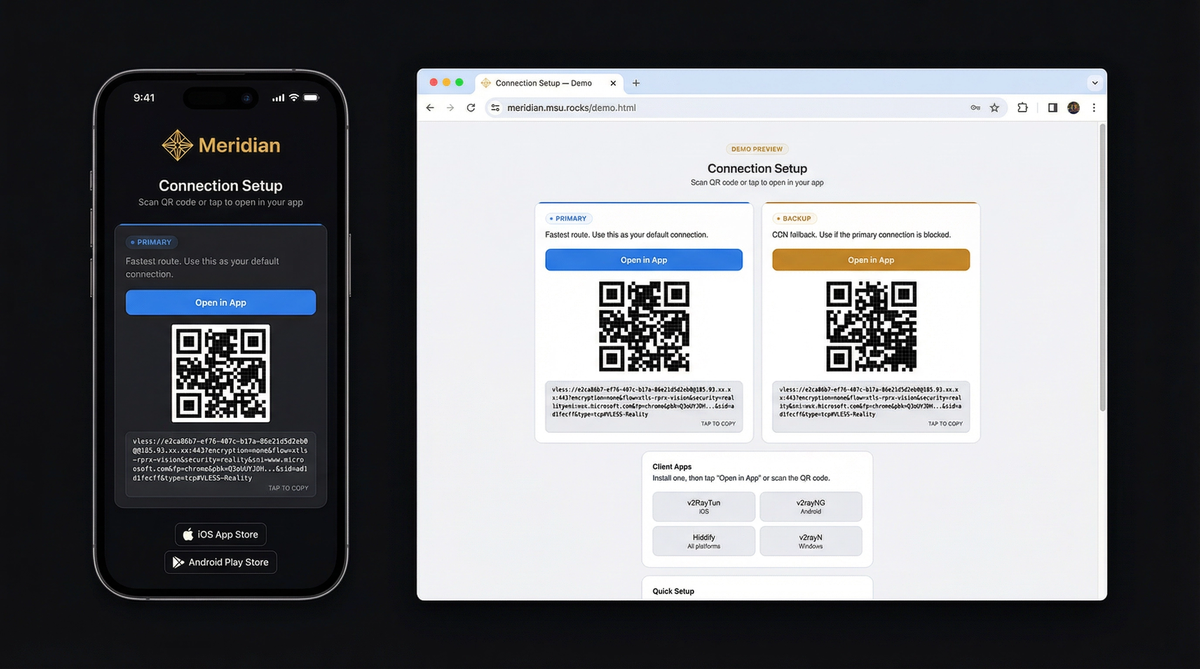
你的朋友收到的页面 — 查看演示
三步获得安全互联网
你需要一台 VPS(每月 $5 的服务器)和笔记本上的终端。Meridian 处理其余一切。
curl -sSf https://getmeridian.org/install.sh | bashmeridian deploy向导会询问服务器 IP 并处理其余事项。或直接传递参数 — 查看 CLI 参考。

幕后发生了什么
构建你的命令
交互式配置参数并复制完整命令。支持所有 Meridian CLI 操作。
Deploy VLESS+Reality proxy. Configures Docker, Xray, firewall, and TLS automatically.
meridian scan for optimal targets. meridian deploy
meridian deploy — the interactive wizard guides you through everything.
为什么审查者无法检测
传统 VPN 具有独特的流量特征。VLESS+Reality 与正常网页浏览无法区分。
深度包检测 (DPI)
DPI analyzes traffic patterns to identify proxy protocols. VPNs like OpenVPN and WireGuard have distinctive packet signatures that are trivial to block.
VLESS+Reality produces traffic byte-for-byte identical to a normal HTTPS connection. No headers, no patterns, no packet sizes that distinguish it from regular web browsing.
主动探测
Censors connect to suspicious servers and try to fingerprint them. If a server responds differently than the website it claims to be, it gets blocked.
Reality uses the TLS certificate from a real website (e.g., microsoft.com). When a probe connects, your server completes the handshake using Microsoft's actual certificate. The probe sees a legitimate server. Only clients with your private key get the proxy tunnel.
TLS 指纹识别
Every TLS client sends a unique "Client Hello" fingerprint. Censors flag connections where the fingerprint doesn't match the claimed application.
Meridian uses uTLS to impersonate Chrome's exact TLS fingerprint — the same one used by billions of devices. Your traffic is indistinguishable from someone browsing the web with Chrome.
扫描即连
部署后,你会得到一个带二维码的连接页面。发送给需要的人——一键连接。
工作原理

独立模式(无域名)
nginx sits on port 443 and routes traffic by TLS SNI using its stream module. Reality connections route to Xray, while nginx's http module handles everything else — serving connection pages over HTTPS with a Let's Encrypt IP certificate (via acme.sh). XHTTP transport runs through nginx via path-based routing — no extra port exposed.
The 3x-ui panel is reverse-proxied by nginx on a secret path — accessible via HTTPS, no SSH tunnel needed.
域名模式(CDN 回退)
Adds three components on top of standalone:
nginx stream inspects TLS SNI without terminating encryption. nginx http terminates TLS with Let's Encrypt certificates managed by acme.sh. VLESS+WSS provides a CDN fallback through Cloudflare — works even if your server's IP is blocked.
中继模式(境内入口)
A lightweight Realm TCP forwarder on a domestic server relays port 443 to your exit server abroad. All protocols work through the relay with end-to-end encryption — the relay never sees your traffic.
Deploy with meridian relay deploy RELAY_IP. Client connection
pages are automatically regenerated with relay routes.